
NOTE: This post is originally from 7/16/2024. It has been updated to correct the image formatting.
Hello, and welcome to another awesome blog post! Today, we will get into something fairly easy, yet lots of fun: Getting to know your copy machine.
The humble copy machine serves four major purposes in your office environment:
– Making copies of your documents
– Printing documents from your PC or other sources
– Converting physical documents to electronic files through scanning
– Receive, send and print out faxes. (This is an additional option)
How well do you know your copier though? Let’s dive in to the major parts of a fully built machine.
NOTE: Your machine may not have all of the equipment shown. These items will be marked with an asterisk (*).
Let’s start with a front view of your machine, the view you will see most often:

1. Main paper trays: Here you can load paper in sizes upto Ledger (11×17). On the right side of this machine is what is called the Multipurpose (MP) tray. You can use this for specialty prints, such as envelopes.
2. Large Capacity Paper trays*: If your copier has this option, you can put upto 3,000 sheets (6 total reams) of standard letter paper (8.5×11). If you do NOT have this option, there will be a cabinet here instead, which makes a good place to store your extra toner.
3. Document processor: This is where all of your scanning and copying is done. You can lift this up to expose the flatbed glass should you need to scan things such as ID cards, etc.
4. Operation panel: This is the main control center of your copier. All functions, such as copying, scanning and faxing are done here.
5. Toner door: Behind this door, you will find the machine’s toner bottles.
6. Exit tray (or bridge/inner finisher*): If you have the finisher option on your machine, the bridge unit will be in this location (pictured). Output from the copier will pass through here and onto the finisher. If you do not have the finisher option, this is where your print and copy jobs will exit. For machines with the inner finisher option, the finisher unit will be here.
7. Finisher unit*: The finisher unit handles many extra duties, depending on your needs. By default, your finisher has the ability to staple. Extra features that can be added include hole punching and folding. Additional accessories, such as a multi-output mail tray can also be added.
8. Equipment ID number: When calling CopyLady for service, you will need to provide this number to the representative you are talking to. This number will also be on the toner boxes for your machine.
9. Waste Toner: This is where you will find your waste toner bottle. Insert the empty black (K) toner here when you change it out. (See post on Waste Toner)
Now, let’s take a look at the right side of your copier:

1. Multipurpose tray: Use this for specialty prints, such as labels or envelopes. Simply grasp the top left corner of this small door, and pull down to open it.
2. Power cord and inlet.
3. Connectivity ports: This is where you will connect your Ethernet for networking your copier. If you opted for FAX capabilities, it will also be here in one of the silver blank spaces (usually in the lower one next to the Ethernet port). You will also find a USB A and USB 3.0 B port here. You can use this for local printing.
4. USB port: You can plug in a flash drive here for the purpose of scanning documents TO your drive, or printing documents FROM your drive! A prompt will appear on the operation panel when you connect your drive.
5. Service Door: Only open this door IF the equipment instructs you to. Generally you will only need to do this when clearing a jam.
Now we will take a look at the Document Processor, or DP:

1. Service Door: Open this if you need to clear a jam OR clean the CIS glass (If you get a streak on the back of your double sided copies/scans)
2. Document Tray: Place your originals here, front side face up.
3. Paper Guides: These tell the copier what size document you have loaded, and in what orientation. Set these up against the loaded documents.
4. Large Size Detection Sensor: This is used to help the machine detect the presence of larger documents (Legal, Ledger, etc).
5. Cleaning Cloth: You will find a microfiber cloth under this cover. Use this to wipe down the glass from time to time to maintain good copy quality.
6. Document Indicator: This will glow GREEN (or BLUE depending on the model) when a document is properly loaded into the feeder. If this is NOT lit when you insert your document, ensure you have inserted it fully.
Let’s take a look at the accessories on your machine (If you have them).
Let’s start with the large-capacity paper feed deck:
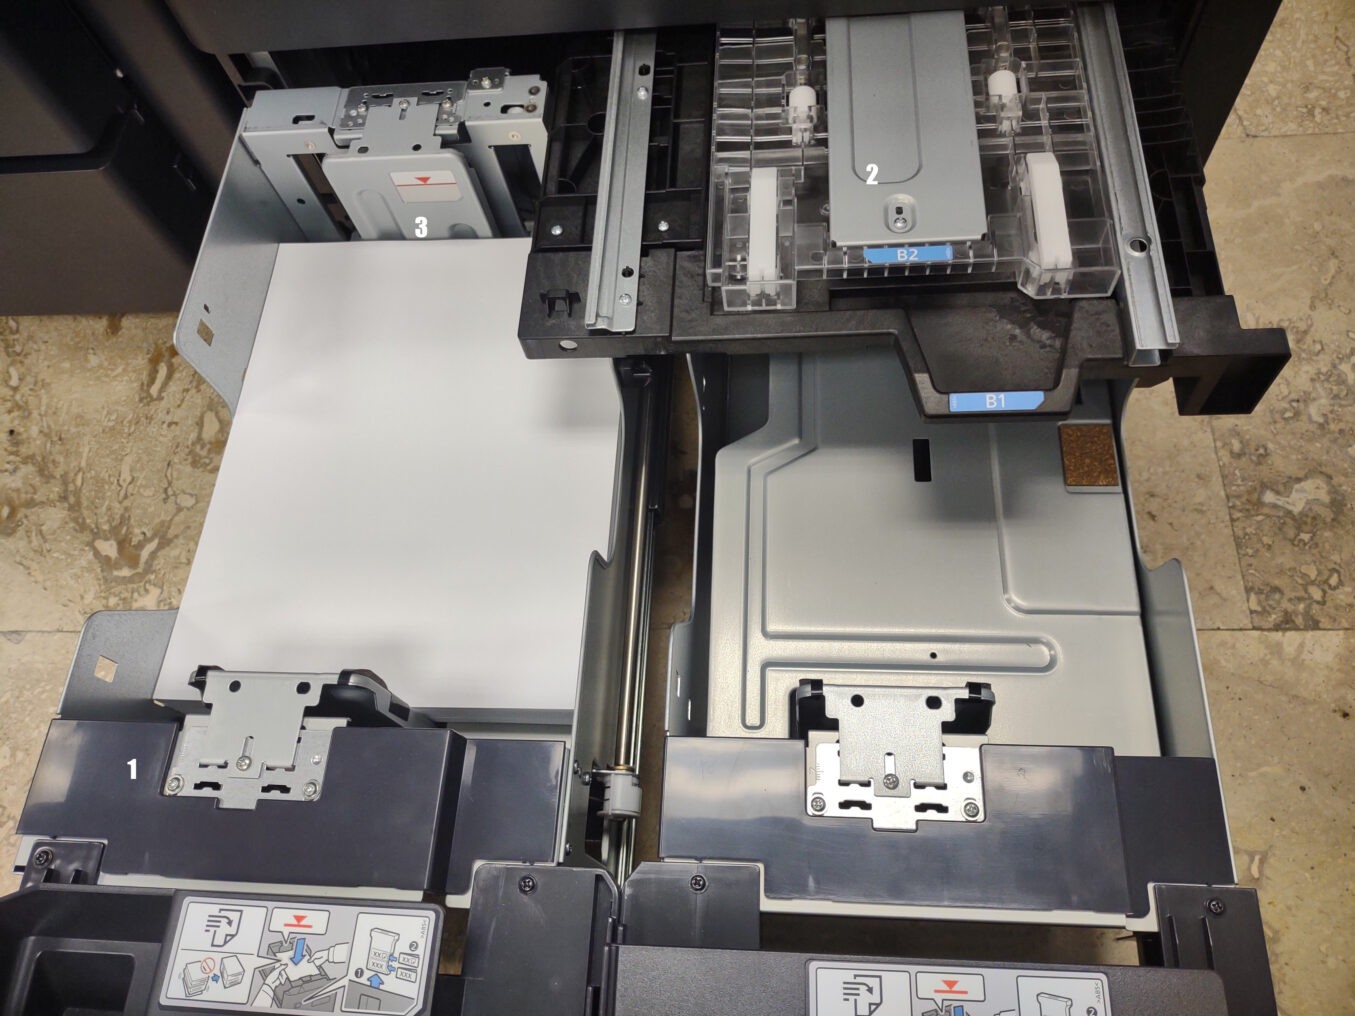
FRONT:
1. Paper Trays: Each tray can hold up to 1,500 sheets of paper (3 Reams each)
2. Feed Tray: Pull out both trays, then pull out B1 and lift up on B2 to clear jammed paper.
3. Max Fill Level Indicator: Indicates the maximum amount of paper you can load. Exceeding this will cause jams and system errors.
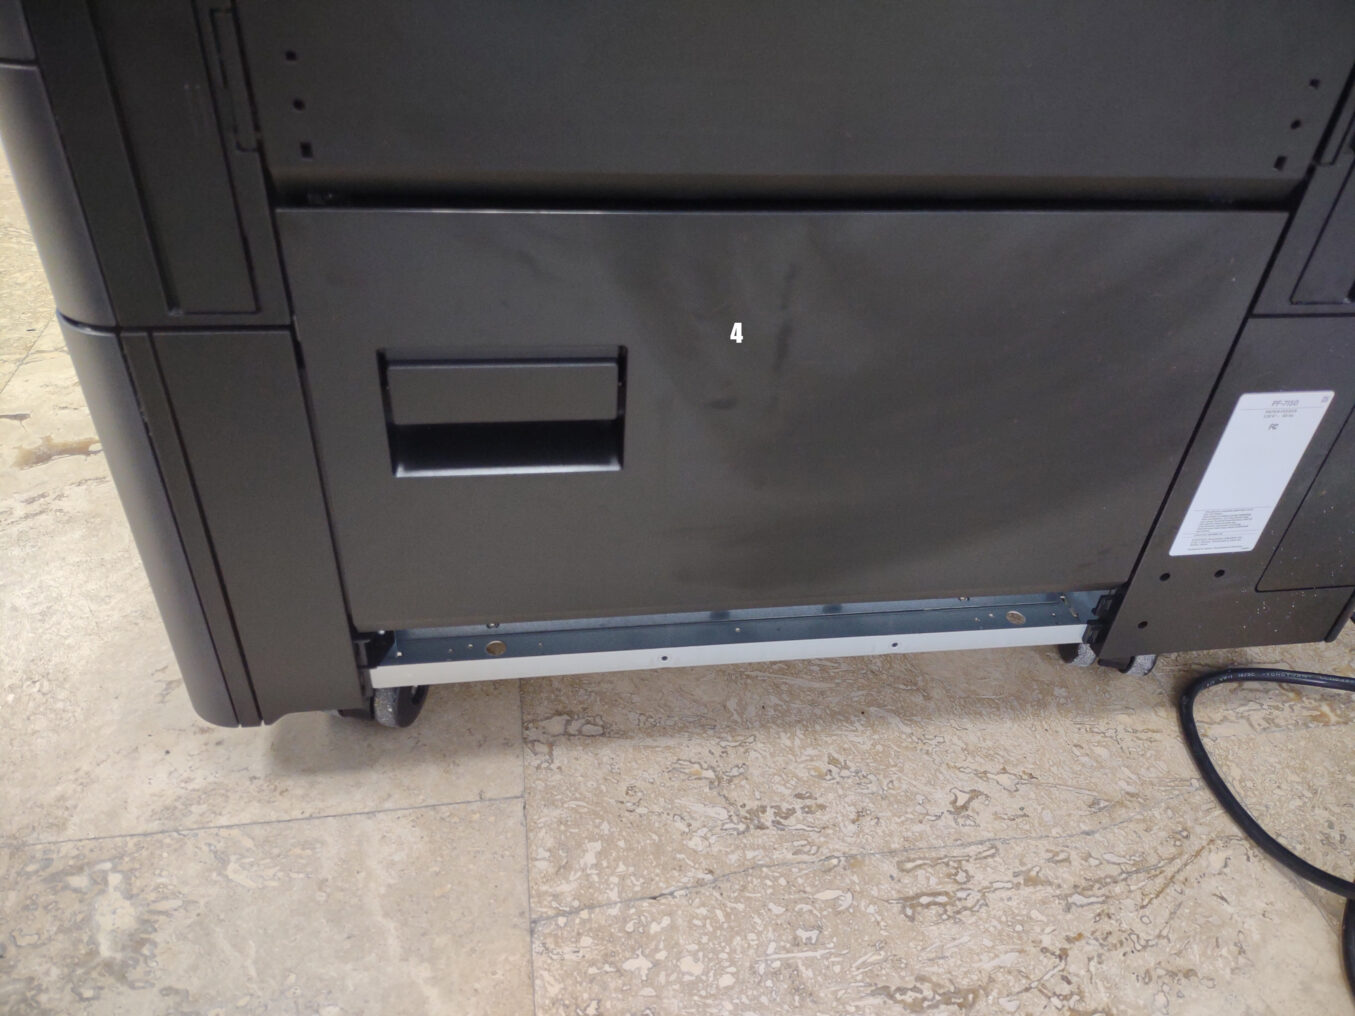
RIGHT SIDE:
4. Service Door: Open this if you need to clear a paper jam.
And now, the finishing unit.


1. Service Door: Open to clear jams, reload staples or empty the punch bin.* Parts 3-5 are located within.
2. Output Trays: These can be extended to accommodate large documents (Legal, etc)
CAUTION: The lower output tray (A) moves up and down. Avoid putting anything under this tray (such as a trash can) as it can cause it to malfunction.
3. Stapler: This does the job of stapling your documents together. It can move itself depending on what type of stapling you require, but you will always find it in this position when you need to reload the staples.
4. Access ports & Roller Knobs (D1-D6): Open or turn these if you are clearing a jam. (What ones to check will be displayed on the operation panel.)
5. Hole Punch Bin*: This is where the waste from hole punching is kept. To empty the punch bin, simply slide it out, dump it, and slide it back in.
So with that aside, Let’s explore one more area that you’ll be introduced to if you encounter a paper jam: The inside of the right side service door:
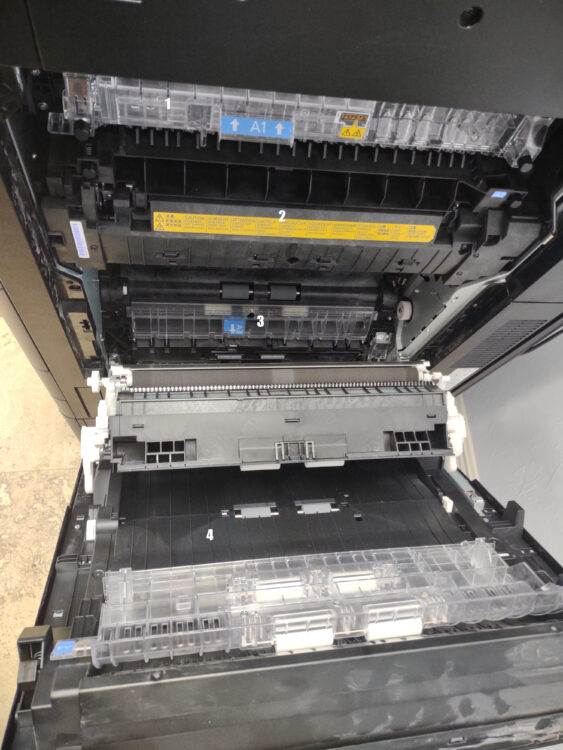
1. Exit Area: Check for obstructions here if you’re experiencing jams at the exit point of your machine.
2. Fuser: Check here if you’re experiencing random unexplained jams.
WARNING: The fuser gets VERY HOT when in operation. If you suspect an issue here, UNPLUG the machine and wait 5 minutes for the fuser to cool off before checking. DO NOT USE SHARP INSTRUMENTS to clear a fuser jam as this can damage the fuser.
3. Paper Feed: Check here if you’re experiencing paper tray feed jams. (Along with checking behind the trays for damaged/stuck paper)
4. Duplexer: Check here if you’re experiencing frequent jams when doing double sided prints or copies.
NOTE: There are only non-customer service panels on the rear of your machine. Do NOT try to remove these. Dangerous things lurk behind these panels. Only our trained service technicians should be removing these if needed.